
Start & End Date
In this article: About the start & end date condition | Examples | How to set up a start & end date trigger
What is the start & end date condition
The start & end date condition lets you schedule content changes between a range of dates. You can set both the start and the end date or set only one of them.
How can you use the start & end date? Examples:
- Schedule a time-limited promotion
- Schedule in-advance special content on holidays
- If your product has a starting time (Shows, courses, webinar, tours, etc.) – Stop their publicity after their start date
Possible Use Cases
Schedule a time-limited promotion

Schedule in advanced special content on holidays

Which content can be set to start and end?
Same as on all If>So’s dynamic triggers, any content of the website can be customized. That includes titles, texts, images, calls to action, and buttons.
How to set up a start & end date condition
- On your WordPress dashboard, go to “If>So → Add New Trigger”.
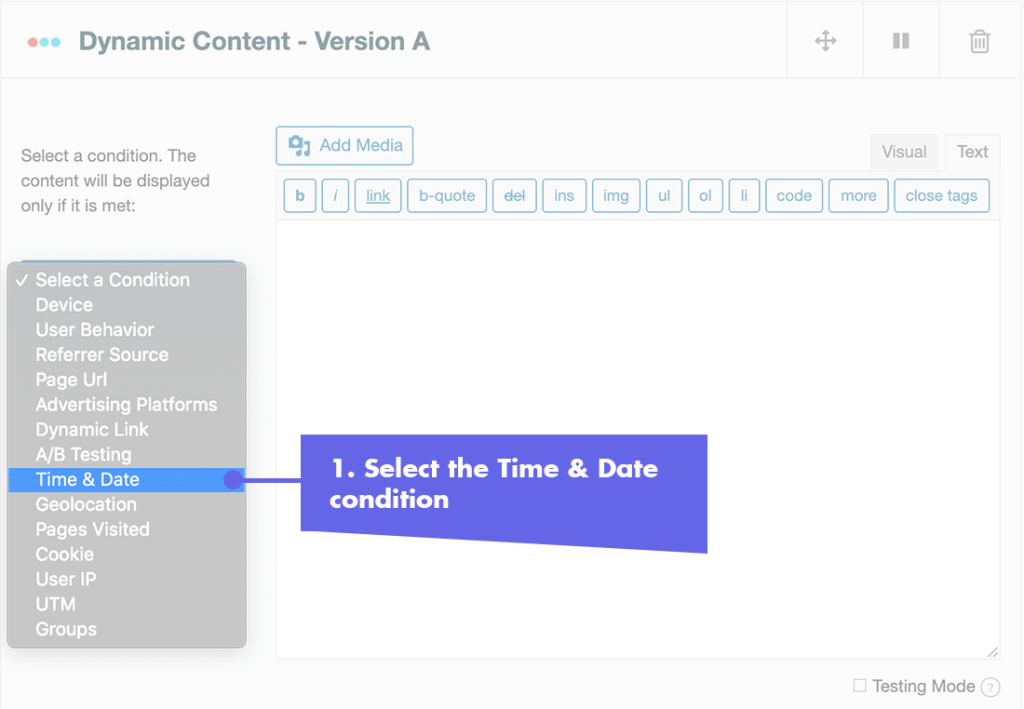
- Click on “Select a condition” and select “Time & Date“.
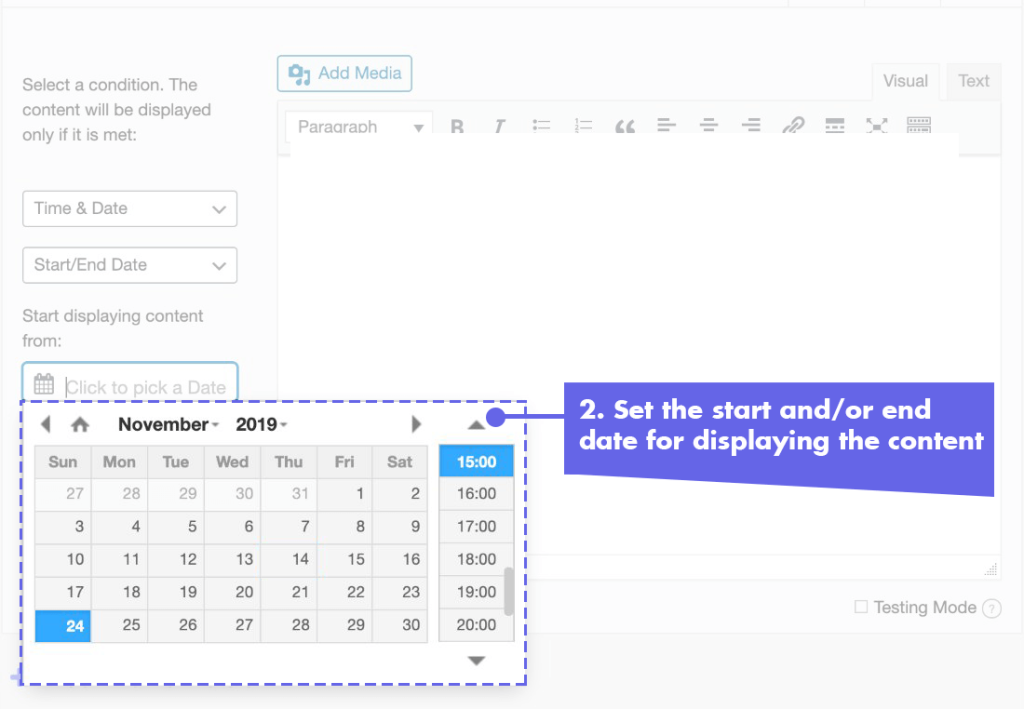
- Select “Start/End date“.
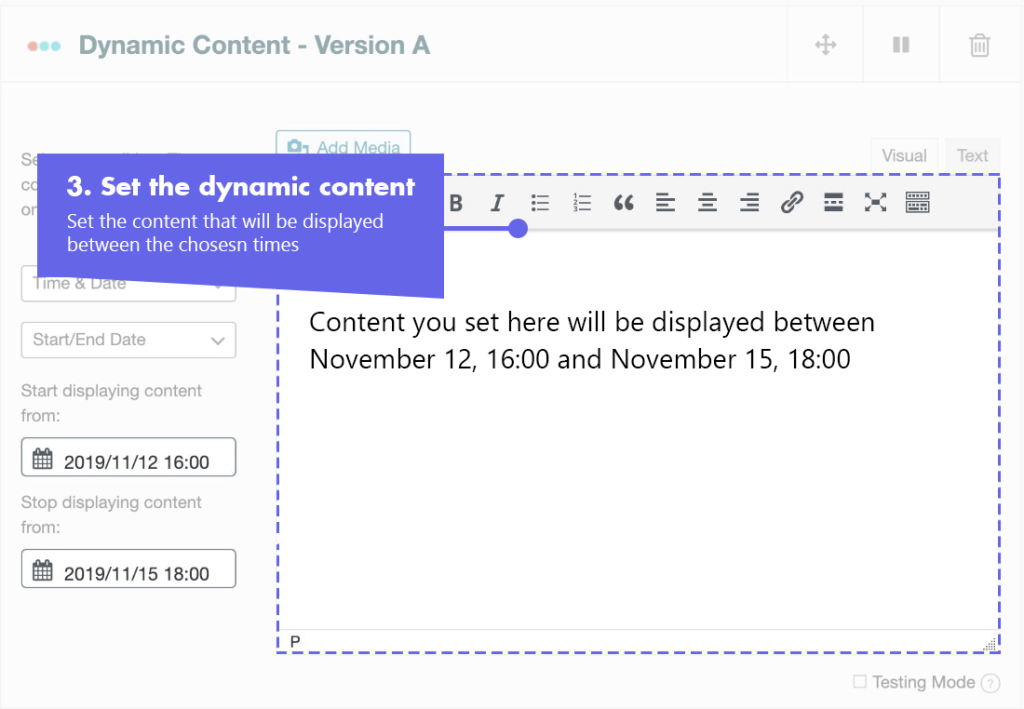
- Pick a starting date and time and an ending date and time for the content to be displayed. You can set only a start date or only an end date if you choose to.
- In the content field, set the content to be displayed between the dates you have chosen
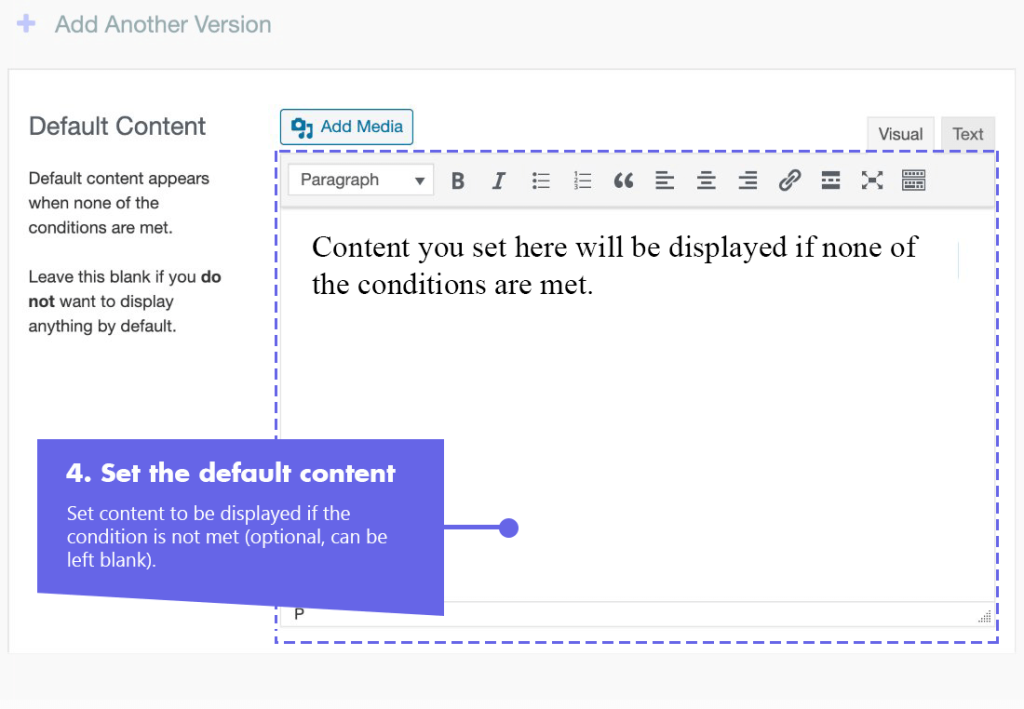
- In the default content field, set content to be displayed before the starting date and after the ending date you have selected (optional, can be left blank).
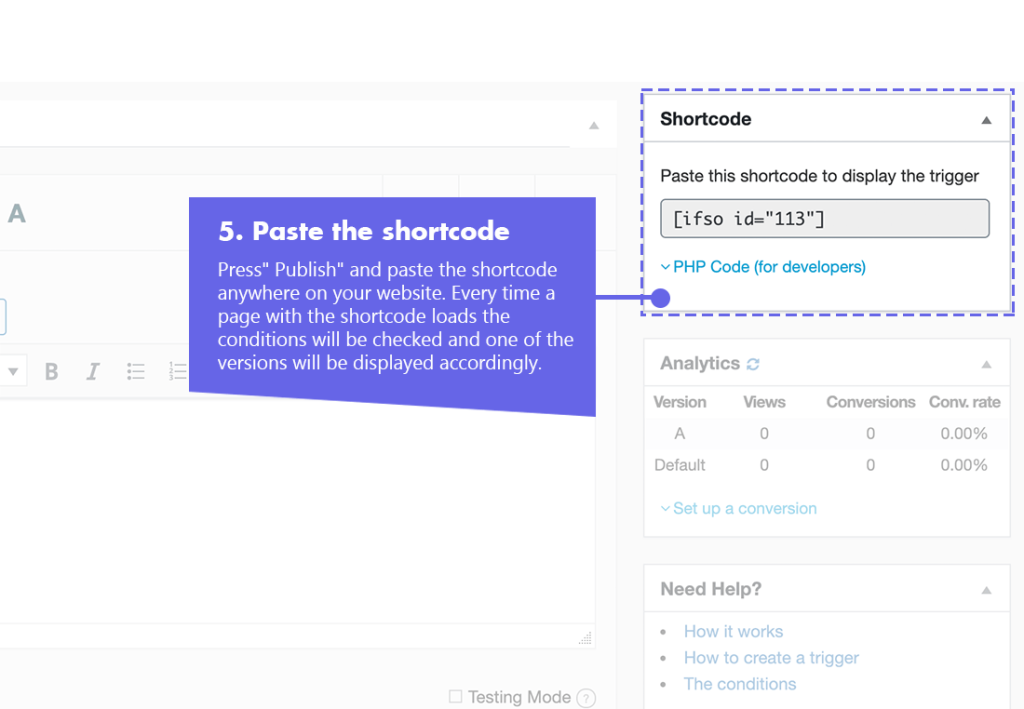
- Press “Publish” and paste the shortcode generated by If>So in your website.
The schedule condition uses your website’s time settings, it is important to make sure they set correctly. To set the time settings go to Settings > General on your WordPress dashboard.
Screenshots
FAQs
- Does If-So work with server-side and WordPress caching solutions?
Yes.
Whether you are using a caching plugin or server caching, you can navigate to the plugin settings and enable the “Page Caching Compatibility” option.
With the option enabled, dynamic triggers will be rendered in a separate request that will take place after the loading of the cached version.
- Is it possible to set up conditional redirects (redirecting users to different pages based on conditions)?
Yes, you can set up conditional redirects based on any If-So condition.