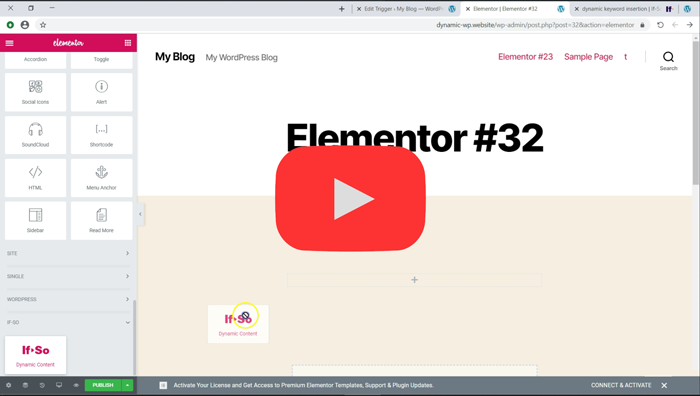
Set up conditional Elementor Elements or Sections. Simply click the element and select a condition from the list.
Elementor is great, but it can be even better! The If-So & Dynamic Content for Elementor Integration allows you to display elementor elements based If-So conditions. No coding is required! Simply set a condition and the element (or section) will be displayed only if it is met.
A complete personalization solution!
Simple to use, dozens of conditions, and:

Page Caching Compatibility
Load the dynamic content after the page loads from the cache

Server-side Solution
Only one version is rendered on page loads

Audiences (segmentation)
Segment visitors and show personalized content when they visit other pages
So▸Simple! Any Elementor Element or Section can be loaded based on conditions
With our Dynamic Content for Elementor Integration, you can set an If-So condition to any Elementor Element or Section. All you need to do is click the element and select a condition from the list.
Which conditions can I set with the Dynamic Content for Elementor Integration?
Each of the If-So conditions can be used to set up dynamic elements. This includes all the conditions offered by the core If-So Dynamic Content plugin and conditions added by integrations like WooCommerce, ActiveCampaign, LearnDash, and the other dozens of available integrations.
Click here for the full list of conditions.
Step-by-step: How to set dynamic Elementor content
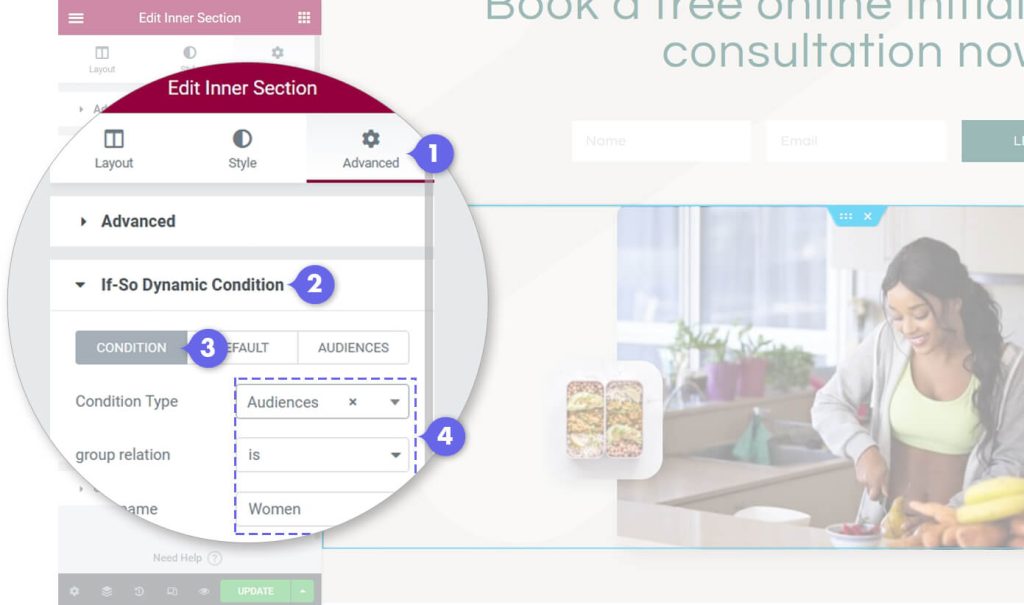
- Click any Elementor element or section.
- Click the Advanced tab and open the “If-So Dynamic Content” section.
- Select a condition from the list.
That’s it! If the condition is met, the element will not be displayed. (Unlike other solutions, it won’t be loaded to the site.)
Set up alternative content when the condition is not met
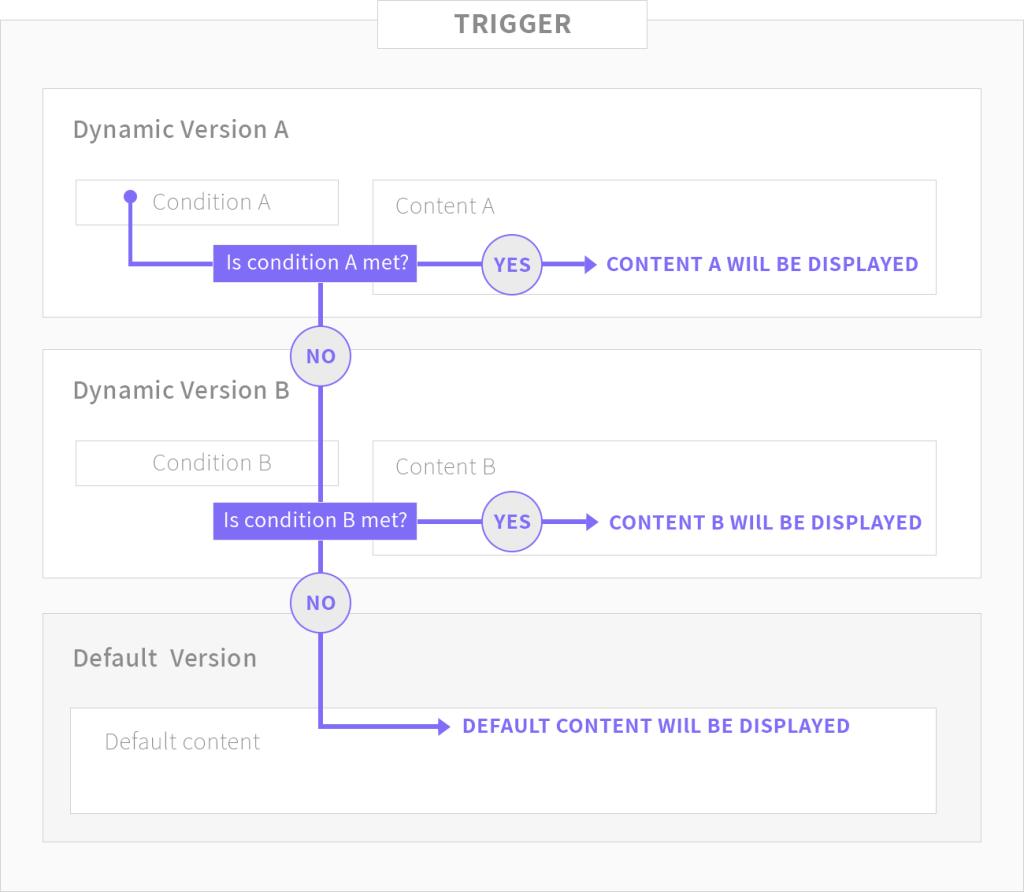
By default, if the condition is not met, the element will simply not be displayed. If you want to set content to be displayed if the condition is not met, you can click the “Default” tab and set alternative content.
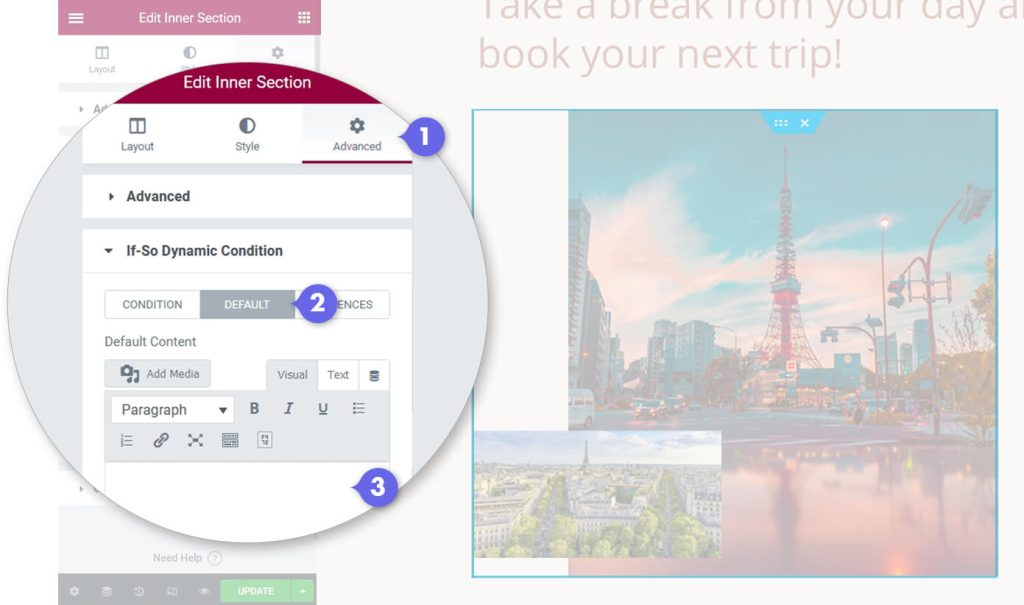
Designing the default content using Elementor
If you’d like to design the default content using Elementor like you used to, instead of using the limited WYSIWYG editor, you can create the default content, save it as a template, and apply the template to the default content field using a shortcode. Scroll down to “Apply Elementor templates to an If-So trigger” to learn more (quick scroll).
Assigning Users to an Audience
The If-So Dynamic Content for Elementor integration allows you to provide a consistent user experience on your site by assigning the user to an audience and then showing dynamic content anywhere on your website to users assigned to that audience (based on a cookie).
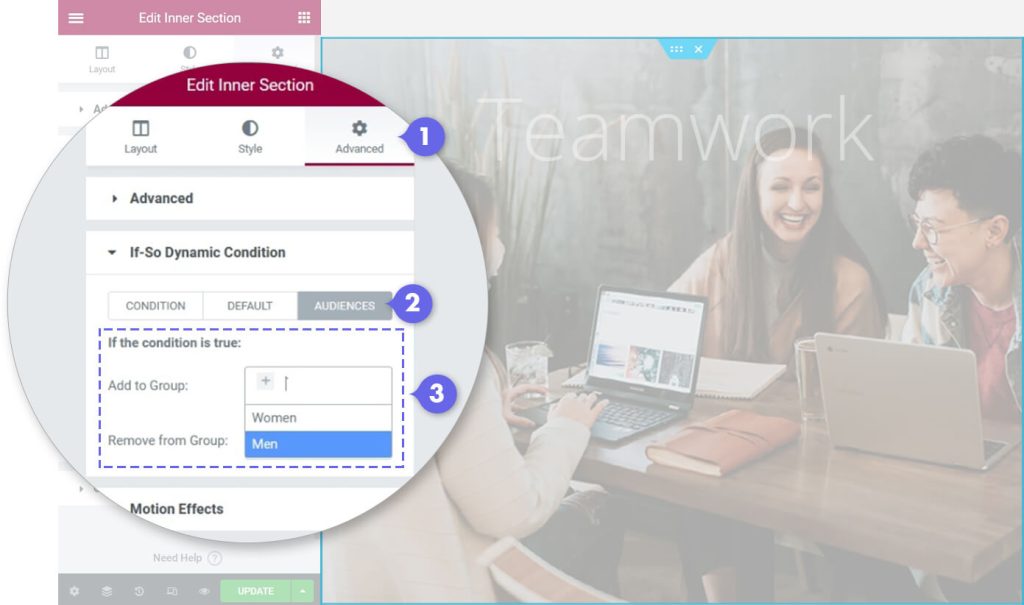
To assign or remove users using the Dynamic Content for Elementor Integration, click the “Audiences” tab and select the audiences you want to assign or remove once a condition is met.
For more information and options for assigning users to an audience
Ajax Loading (Page Caching Compatibility)
If-So is entirely compatible with page caching. If you are using cache on your site, simply enable the Ajax Loading option (located below the condition). The dynamic content will be loaded using Ajax immediately after the rest of the page loads from the cache.
Note that because the content is loaded after the page loads from the cache, there will be a slight delay in the appearance of the dynamic content. In most cases, the delay is insignificant. If you find it too long, the alternative is to disable the page caching for the specific page with the dynamic content. (This is not recommended, of course.)
An alternative method for setting up dynamic content for Elementor – Creating an If-So trigger
In some cases, you might need or prefer to create your dynamic content using an If-So trigger instead of setting the condition directly at the element level. Such cases might include the following:
- You want to make use of If-So’s built-in analytics system.
- The condition you wish to use is available only with the use of triggers (A/B testing, schedule, start and end dates).
- You’d like to design content with Elementor as the default content that will be displayed when the condition is not met.
To create your content with Elementor and apply it to an If-So trigger, simply save your content as a template and insert it into your trigger using the template’s shortcode. The same method works if you want to apply the template to the default content field of another element.
Saving the content as a template
- Create and design the section (or element).
- Choose the section and right-click on the Edit Section button.
- After you click on the section, a menu appears with a few options. Choose the Save as Template option. Give your template a proper name and save.
Applying the template to your trigger
- On your WordPress dashboard, go to If-So > Add new Trigger.
- Select a condition. You can add as many versions as you want, each with a different condition.
- If you are using Elementor Pro, navigate to your WordPress Dashboard -> Templates -> Saved Templates. Copy the Shortcode for the template and paste it into one of your trigger’s versions.
If you’re using the free version, you can look for a free third-party plugin (like piotnet) that will add the same functionality. - Publish your trigger.
Apply the trigger to your page using a text, title, HTML, or shortcode element. Alternatively, you can use our dedicated dynamic content element and select the relevant trigger. The advantage of using this option is that you’ll be able to see the trigger’s built-in analytics when you’re editing the page.
Frequently Asked Questions
What is dynamic content for Elementor?
Dynamic content for Elementor is the option to display different elements and/or sections based on conditions to provide a personalized content experience for each viewer. This is different than the default dynamic tags feature in Elementor, which allows users to insert dynamic information, such as post titles or dates, into their website design.
Among others, dynamic content can be served based on the viewer’s location, the referring website, UTM parameters, the user’s search term on Google Ads campaigns, and more.
Dynamic content for Elementor is particularly useful for WooCommerce websites, as it allows them to display relevant products or promotions to each viewer.
Dynamic Elementor content can be served in two ways: loading the element to the page but making it not visible to the user or not loading the element at all and keeping the page cleaner and faster, as If-So Dynamic Content does.
How do I set dynamic visibility for Elementor? (2 methods)
Setting dynamic content for Elementor is simple and does not require any coding. Once you install the If-So and Dynamic Content for Elementor integration, simply:
1. Select the element.
2. Click the advanced tab and open the “If-So Dynamic Content” section.
3. Select a condition.
Alternatively, you can create an If-So trigger with multiple versions, select the conditions and dynamic content, and apply the trigger to your page using the If-So Dynamic Content Elementor element
